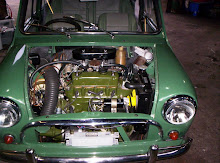
Only two further items are necessary when lubrication is carried out at home. If an inspection pit is not available, a pair of wheel ramps will be required to provide adequate clearance for lubricating the front suspension, steering and the drive shafts, handbrake cables, draining the sump, and, incidentally, servicing the petrol pump.
Although the ordinary type of grease gun is quite efficient the side-lever type of gun is to be preferred. It enables a very high pressure to be developed with little effort, and has also the advantage of being fitted with a long extension tube, which makes it easy to reach less accessible points, and a snap-on hydraulic connector which provides a perfect seal without the need for applying pressure against the nipples.
These items will render the owner virtually independent of a service station, and their cost will probably be more than recovered during the first few months of home servicing.
A large-scale lubrication chart, printed on stout paper and suitable for hanging on the garage wall, is always an asset. It is worth recording that such charts, covering a very wide range of cars and models in addition to those covered by this book, can be obtained free of charge from the Castrol Chart Library, Castrol House, Marylebone Road, London, N.W.I.
Sunday, 18 October 2009
Lubrication Equipment
Lubricating the Water Pump
The small plug which seals the lubrication point on the water pump, just behind the fan pulley, is apt to be overlooked. When carrying out the 6,000-mile service, this plug should be unscrewed and a few drops of SAE 140 gear oil should be dripped into the opening. It is important not to force in oil or grease with the grease gun and not to overlubricate the pump, as excess oil will find its way past the bearings on to the face of the special carbon sealing ring, reducing its efficiency.
Thursday, 15 October 2009
S.U. FUEL PUMP
Earlier models were fitted with the PD type of pump shown in Fig. 30 Later models have the type of pump illustrated in Fig. 31, which is basically similar to the other types of S.U. horizontal pumps with which many readers will probably be familiar. It does differ, however, in the arrangement of the valves and may have twin contact points. It is fully described on pages 76-8.
These later pumps are very reliable and seldom need attention which is, perhaps, just as well, as they are mounted beneath the car. The earlier PD pumps sometimes gave trouble and if a pump requires an overhaul there is a good deal to be said for replacing it by the later design.
This can sometimes give rise to a further trouble, however, as the later pump produces a higher fuel pressure, which may cause the carburettor

The earlier S.U. electrical fuel pump (type PD). The pump is mounted on the inside of the left-hand rear sub-frame side member:
1, contact-breaker cover; 2, filter cover
to flood. Rough idling, occasional stalling and difficulty when adjusting the carburettor will result and fuel consumption will suffer.
The cure is to replace the float-chamber lid with the later pattern which has a nylon-cased needle and a nylon float. If your car is one on which the fuel pump has been replaced by the later type but this modification has not been carried out, the new float-chamber lid can be fitted in a few minutes. The cost is about a guinea.
Still more recent engines (for example the Clubman and 1275 GT) have mechanical S.U. pumps, mounted on the bulkhead-side of the engine [see page 78).