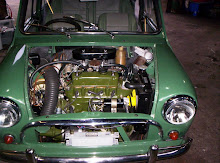
Mention has already been made, in Chapter 3, of the somewhat inaccessible ignition distributor. There is everything to be said for removing either the front grille, to provide reasonable access to the contact-breaker mechanism, or detaching the distributor itself and carrying out the work on the bench, as described in Chapter 7. The trouble will be well worthwhile, in view of the vital importance of the contact-breaker points, which can affect the whole range of performance of the engine—a fact that receives far too little emphasis in manufacturers' instruction books, which tend to dismiss the question of cleaning and setting the contact-breaker points in a couple of short paragraphs. If time is limited, it is better to leave well alone until it is possible to carry out a thorough check, as described in Chapter 7. Never try to measure and adjust the gap without first truing-up the points.
Saturday, 17 October 2009
Carburettor Air Cleaner
The air cleaner fitted to all models except the early Coopers contains a pleated-paper filtering unit (a pair of units in the case of later Coopers) which must be replaced at 12,000-mile intervals. It is as well to inspect the cleaner during the 6,000-mile service, however, since if it has become clogged with dust or is greasy and badly discoloured, it would be as well to renew it at this stage. A. choked element will restrict the amount of air that is drawn into the carburettor, causing loss of per¬formance and increased petrol consumption.

The "pancake" wire-mesh air filters fitted to the earlier Cooper models require a different treatment from those just described. Remove the filters, swill the mesh in petrol, dip each filter in engine oil and allow the surplus oil to drain off before refitting the filter to the carburettor.
The filters used on later Coopers contain two pleated-paper elements which must be replaced. The air intake is not adjustable to a warm-air or cool-air position, as is the case with other Minis.

Adjusting the fan belt tension. The nuts shown must be slackened in addition to the nut on the slotted strut before attempting to move the dynamo. Otherwise the brackets may be fractured
Keep the Plugs Clean
A smoothly-running engine, good "tick-over," easy starting, and a full power output combined with good petrol con¬sumption, depend to a large extent on the sparking plugs, which require regular attention if engine efficiency is to be maintained. This attention involves keeping the plugs clean and the electrode gaps correctly adjusted. In the ordinary way examine the plugs every few thousand miles. Note whether the plugs' internal insulators are sooty or oily. The method of cleaning them and setting the gaps is dealt with in detail in Chapter 7.
Changing the Tyres Around
Apart from regular pressure checks, longer life can be obtained from a set of tyres by equalizing, as far as

The carburettor air filter element
possible, the wear on the individual treads. This calls for changing the wheels around. Fig. 50 shows alternative schemes, the choice depending on whether a reliable tyre is fitted to the spare wheel. At the same time examine the treads carefully and prise out any flints or other sharp objects. The tyres are discussed more fully in Chapter 9.
Tyre Pressure Checks
It is essential to use an accurate pressure gauge when checking the tyre pressures (which are listed in the Appendix) and to protect it from knocks and grit when it is not in use. Garage airline gauges are not always accurate.
Whenever pressures are checked, make sure that the valve caps are replaced and tightened firmly. These are intended to prevent leakage and at the same time exclude mud, grit and ice from the relatively vulnerable inner seals. If a cap should be lost a replacement should be fitted as soon as possible.
If the tyres are fitted with inner tubes, pressure will be lost at the rate of from 1 to 3 lb per week, owing to a process known as "diffusion."
Oxygen from the air in the tyre is absorbed by the rubber and a corres¬ponding amount of oxygen is given off from the outer surface of the tube. It is necessary, therefore, to restore this slight loss of pressure even when the tubes are in first-class condition. Synthetic rubber tubes and tubeless tyres do not suffer from this disadvantage but it is still advisable to check the pressures regularly.
Check the Shock Absorbers for Leakage
The tubular, telescopic hydraulic shock-absorbers, or suspension dampers, as they may more accurately be termed, fitted to Minis which are not equipped with Hydro-lastic suspension, require no topping-up. Being sealed units, they can neither be adjusted nor refilled with fluid should any leakage develop. Any external signs of fluid leakage, or loss of efficiency due to wear of the internal parts, therefore, calls for renewal of the shock absorbers as described in Chapter 9. When checking the shock absorbers, make sure that the rubber bushes in the eyes at each end are in good condition and check the tightness of the securing nuts. Often a surprisingly large amount of movement of the suspension arm can take place before the shock absorber comes into action, solely owing to loose securing nuts or worn bushes.
Brake and Clutch Fluid Reservoirs
These are in the engine compart¬ment. Wipe the caps and tops clean before unscrewing the caps to check the fluid levels. Top-up if necessary to within £ in. of the top of each reservoir, using Lockheed Heavy-duty Brake and Clutch Fluid.
It should be emphasized that this is, primarily, a precautionary check. If the systems are in good condition, topping-up should be required only at very long intervals. But leaks can develop from hydraulic pipelines and screwed unions, or past rubber seals in the operating cylinders; and loss of fluid from the braking system could have disastrous results. Alter¬natively, if the clutch operating system is affected, it will be impossible to free the clutch completely, thus virtually immobilizing the car.
If the level of the fluid in either reservoir has fallen appreciably, there¬fore, an assistant should be asked to apply firm pressure to the appropriate pedal while the pipeline and operating cylinders are minutely examined for any signs of leakage. If slight leakage has occurred—say, from a slack union—it may not be sufficient simply to tighten the union and top-up the reservoir; air may have entered the system, giving the pedal a charac¬teristically "spongy" feel. The method of bleeding off the air is described in Chapter 10.
A further point to check is that the air vent holes in the filler caps of the reservoirs are clear. If these become choked there is a risk of, the brakes dragging or the clutch slipping, depending on which reservoir is affected.